
Framing the First Story
Builder's Log: Chapter 4

My apologies, dear reader. The past 6 weeks have been quite chaotic, putting this project on the backburner for longer than I would have liked. Winter struck, freezing the water pipes to our temporary home and causing us to take a millennial’s holiday in my parent’s basement. We’ve been playing catch up ever since. Back to the story…


At this point, we are two and a half years in, having taken longer than anticipated in preparing to build and doing other development work on the property. These delays in the end meant big savings, which is not usually what happens when a construction process encounters delays. Getting the lumber milled took time, during which I built a 16’x24’ shop and a 12’x10’ office for Lucia. I also fully fenced our 0.6 acre parcel to protect our developing garden from the delightfully picturesque but botanically destructive white-tail deer who roam the island without natural predators (aside from F150s and seasonal hunters).


Up until I had stripped the formwork and walked along the smooth surface of our freshly cured foundation, the notion that we were actually building a house existed mostly in the abstract, in the murky territory between plans and pipe dreams. I have come to believe that building your own house is the type of project that only feels like it is advancing when the proverbial page is refreshed. So much takes place before walls go up that one needs milestones to stand back and realize that the haphazard tackling of small tasks does amount to real progress. A bird’s eye view on the project makes the process overwhelming. There’s just too much to do. A myopic focus on the task at hand keeps work moving forward. Keep doing that a few thousand times and you might just find yourself with the approximations of a house, or the foundation on which to build one. Framing is an altogether different and much more satisfying experience and it starts with good lumber.


When supplying our desired cut-list to the mill, we actually had no idea how many of the logs would produce usable lumber. As I mentioned in a previous article, we rank ordered the cut-list by the market-price to purchase that same lumber. Our modal cut was 2x8 for joists, followed by 2x12s for floor beams and 2x10s for rafters. If you’ve been following from the beginning, you’ll know there are are no floor beams in a slab-on-grade construction.
All the 2x12s, save for the ridge beams, eventually had to be cut down to 2x10s for the rafters. And I was still short, and had to purchase seven 20’ 2x10s. The smallest cuts we ordered, 2x4 and 2x6, were nowhere near enough to frame a house. They did however, provide enough lumber for top and bottom plates, so that the only major lumber purchase made for this project was for the studs and the plywood. This worked out really well, as precut studs had come down in price from $11.25 mid-pandemic to just about 4$. So nearly every horizontal member of the building is from the fir trees we felled and every vertical member was factory precut, saving a lot of time cutting the 400+ studs and and a fair chunk of change on lumber.
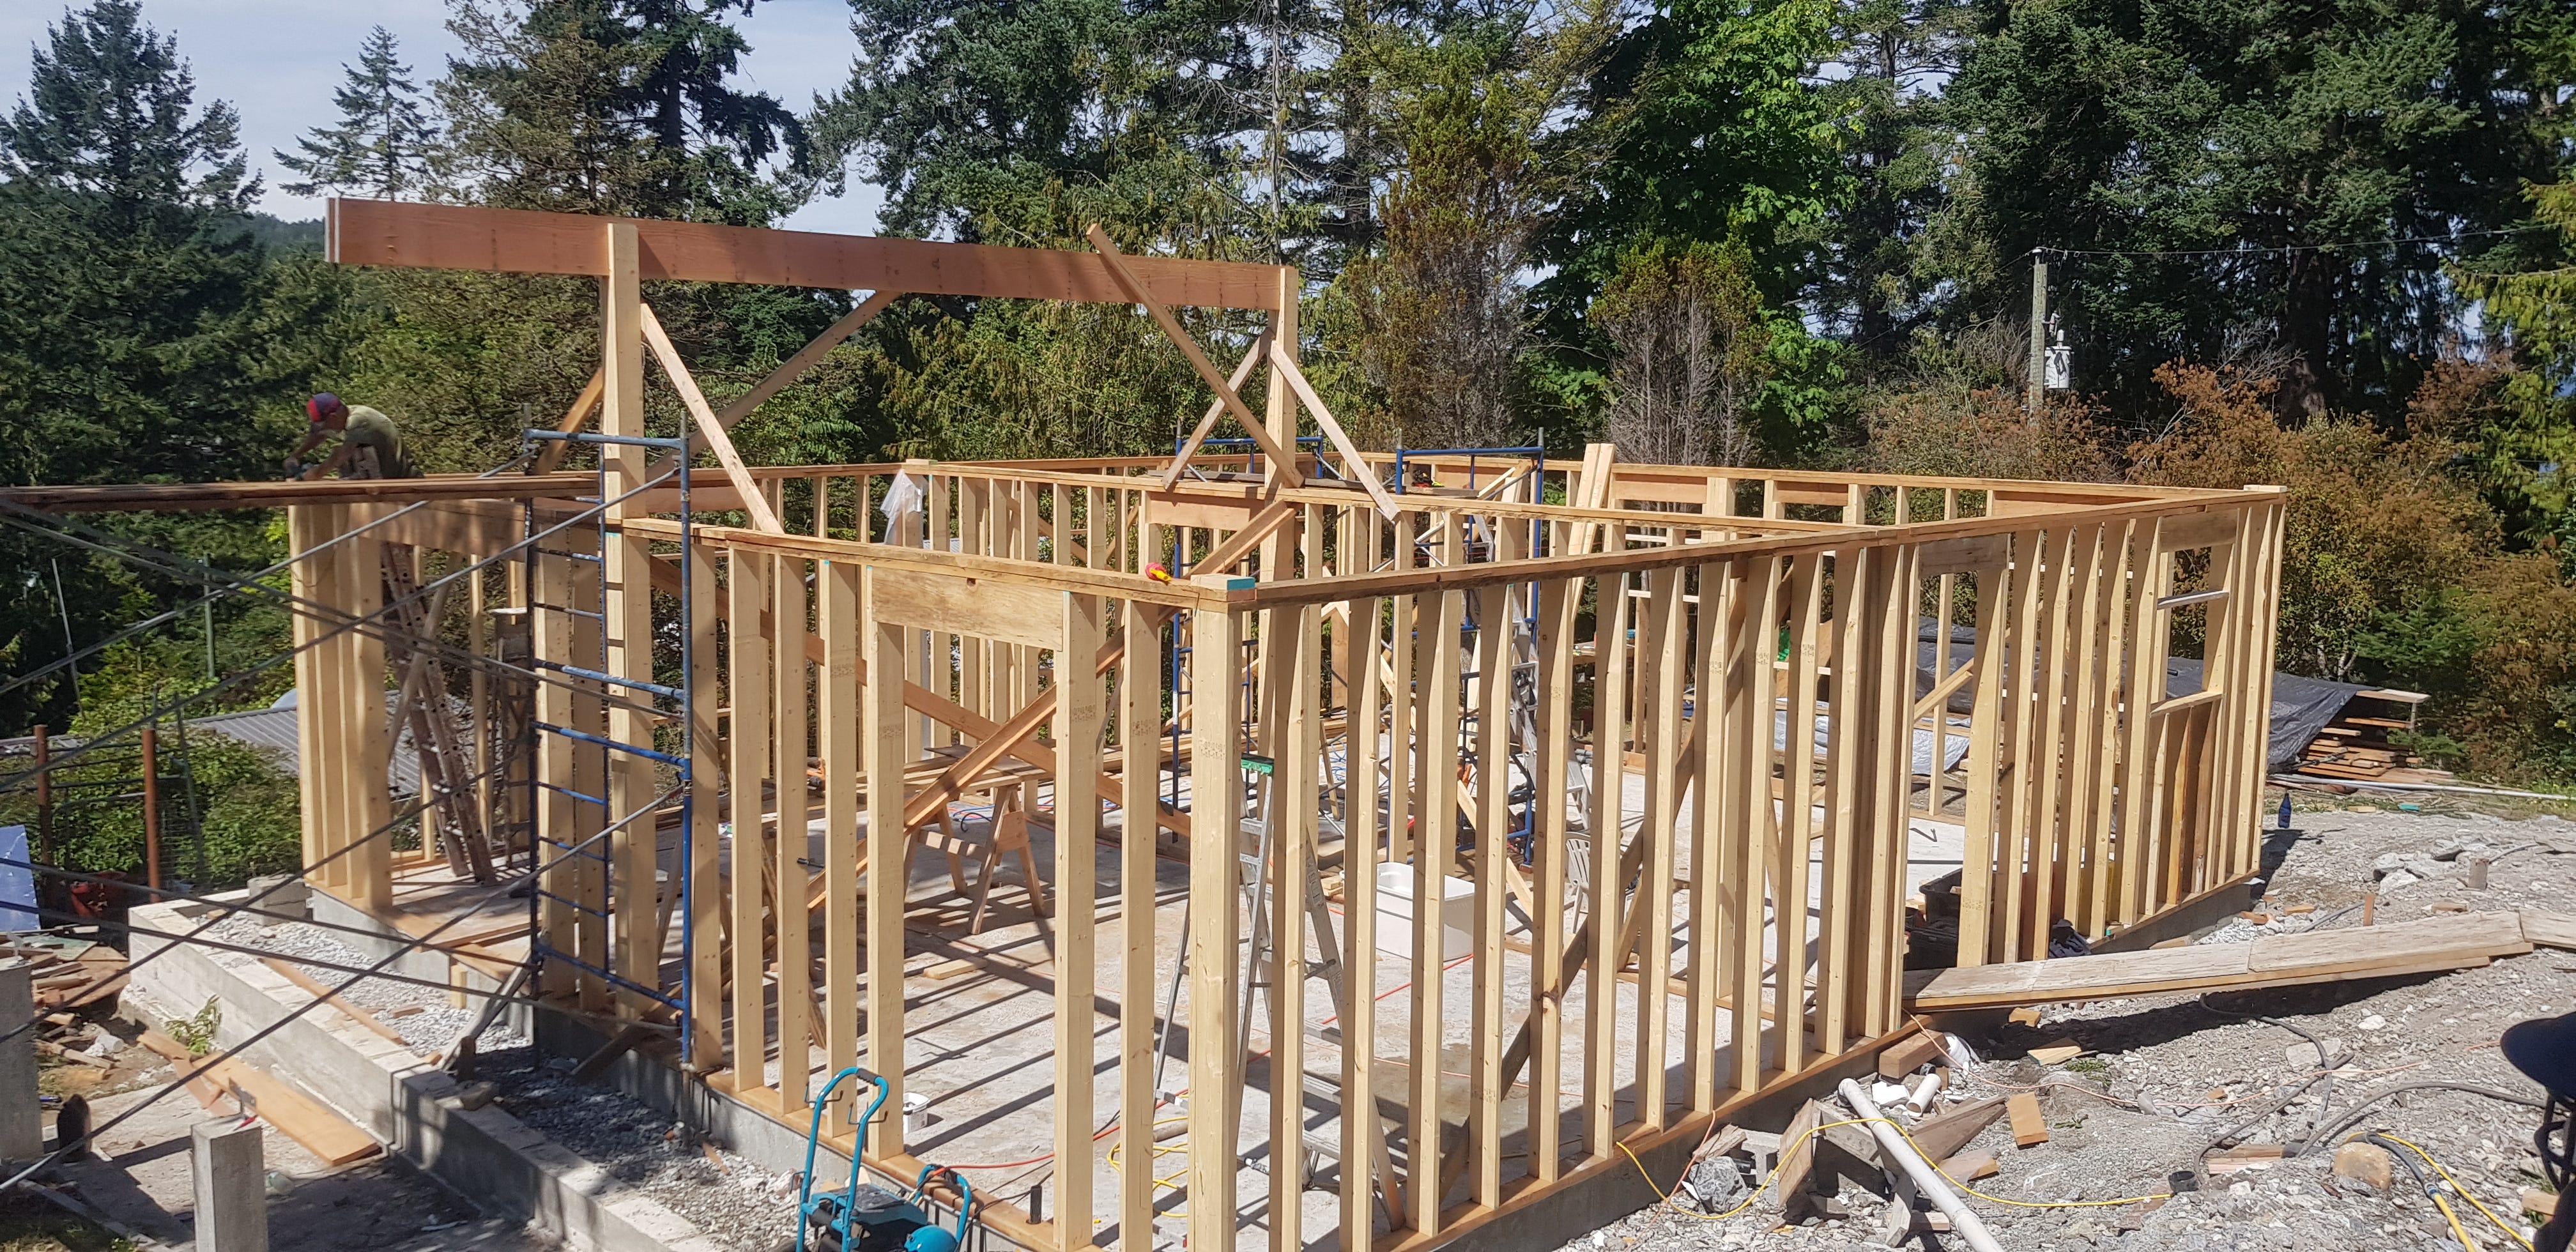
A few members of the old crew I worked with graciously agreed to come spend a few days at the homestead, doing what carpenters do: framing and drinking beer. Adding a few skilled tradesman to the mix led us to frame the first floor of the house in about two and a half days. The process would have gone even faster had there not been so much sorting and processing of rough sawn lumber. Once I had gone around with Steve marking the door and window layout, the guys worked so quickly and seamlessly together that Dad and I naturally fell into a support role, moving lumber from the woodshed to the building and lifting, twisting and banging whenever four hands were insufficient, trying to keep up.


With mixed lengths of fir 2x6(-ish) the bottoms plates were laid out either side of the foundation. Measuring from one corner, studs are marked at 16” on center, and king and jack studs for windows are marked as per plan. Marks are then transferred from bottom to top plate and separated on the ground a little over a studs width apart. Studs are then sighted and crowned, where the natural coronal curve of the board is marked and placed facing the same direction, to avoid creating wavy interior wall faces on which to hang drywall or interior finishings. A stud is placed at each mark and a nail gun makes short work of the assembly.
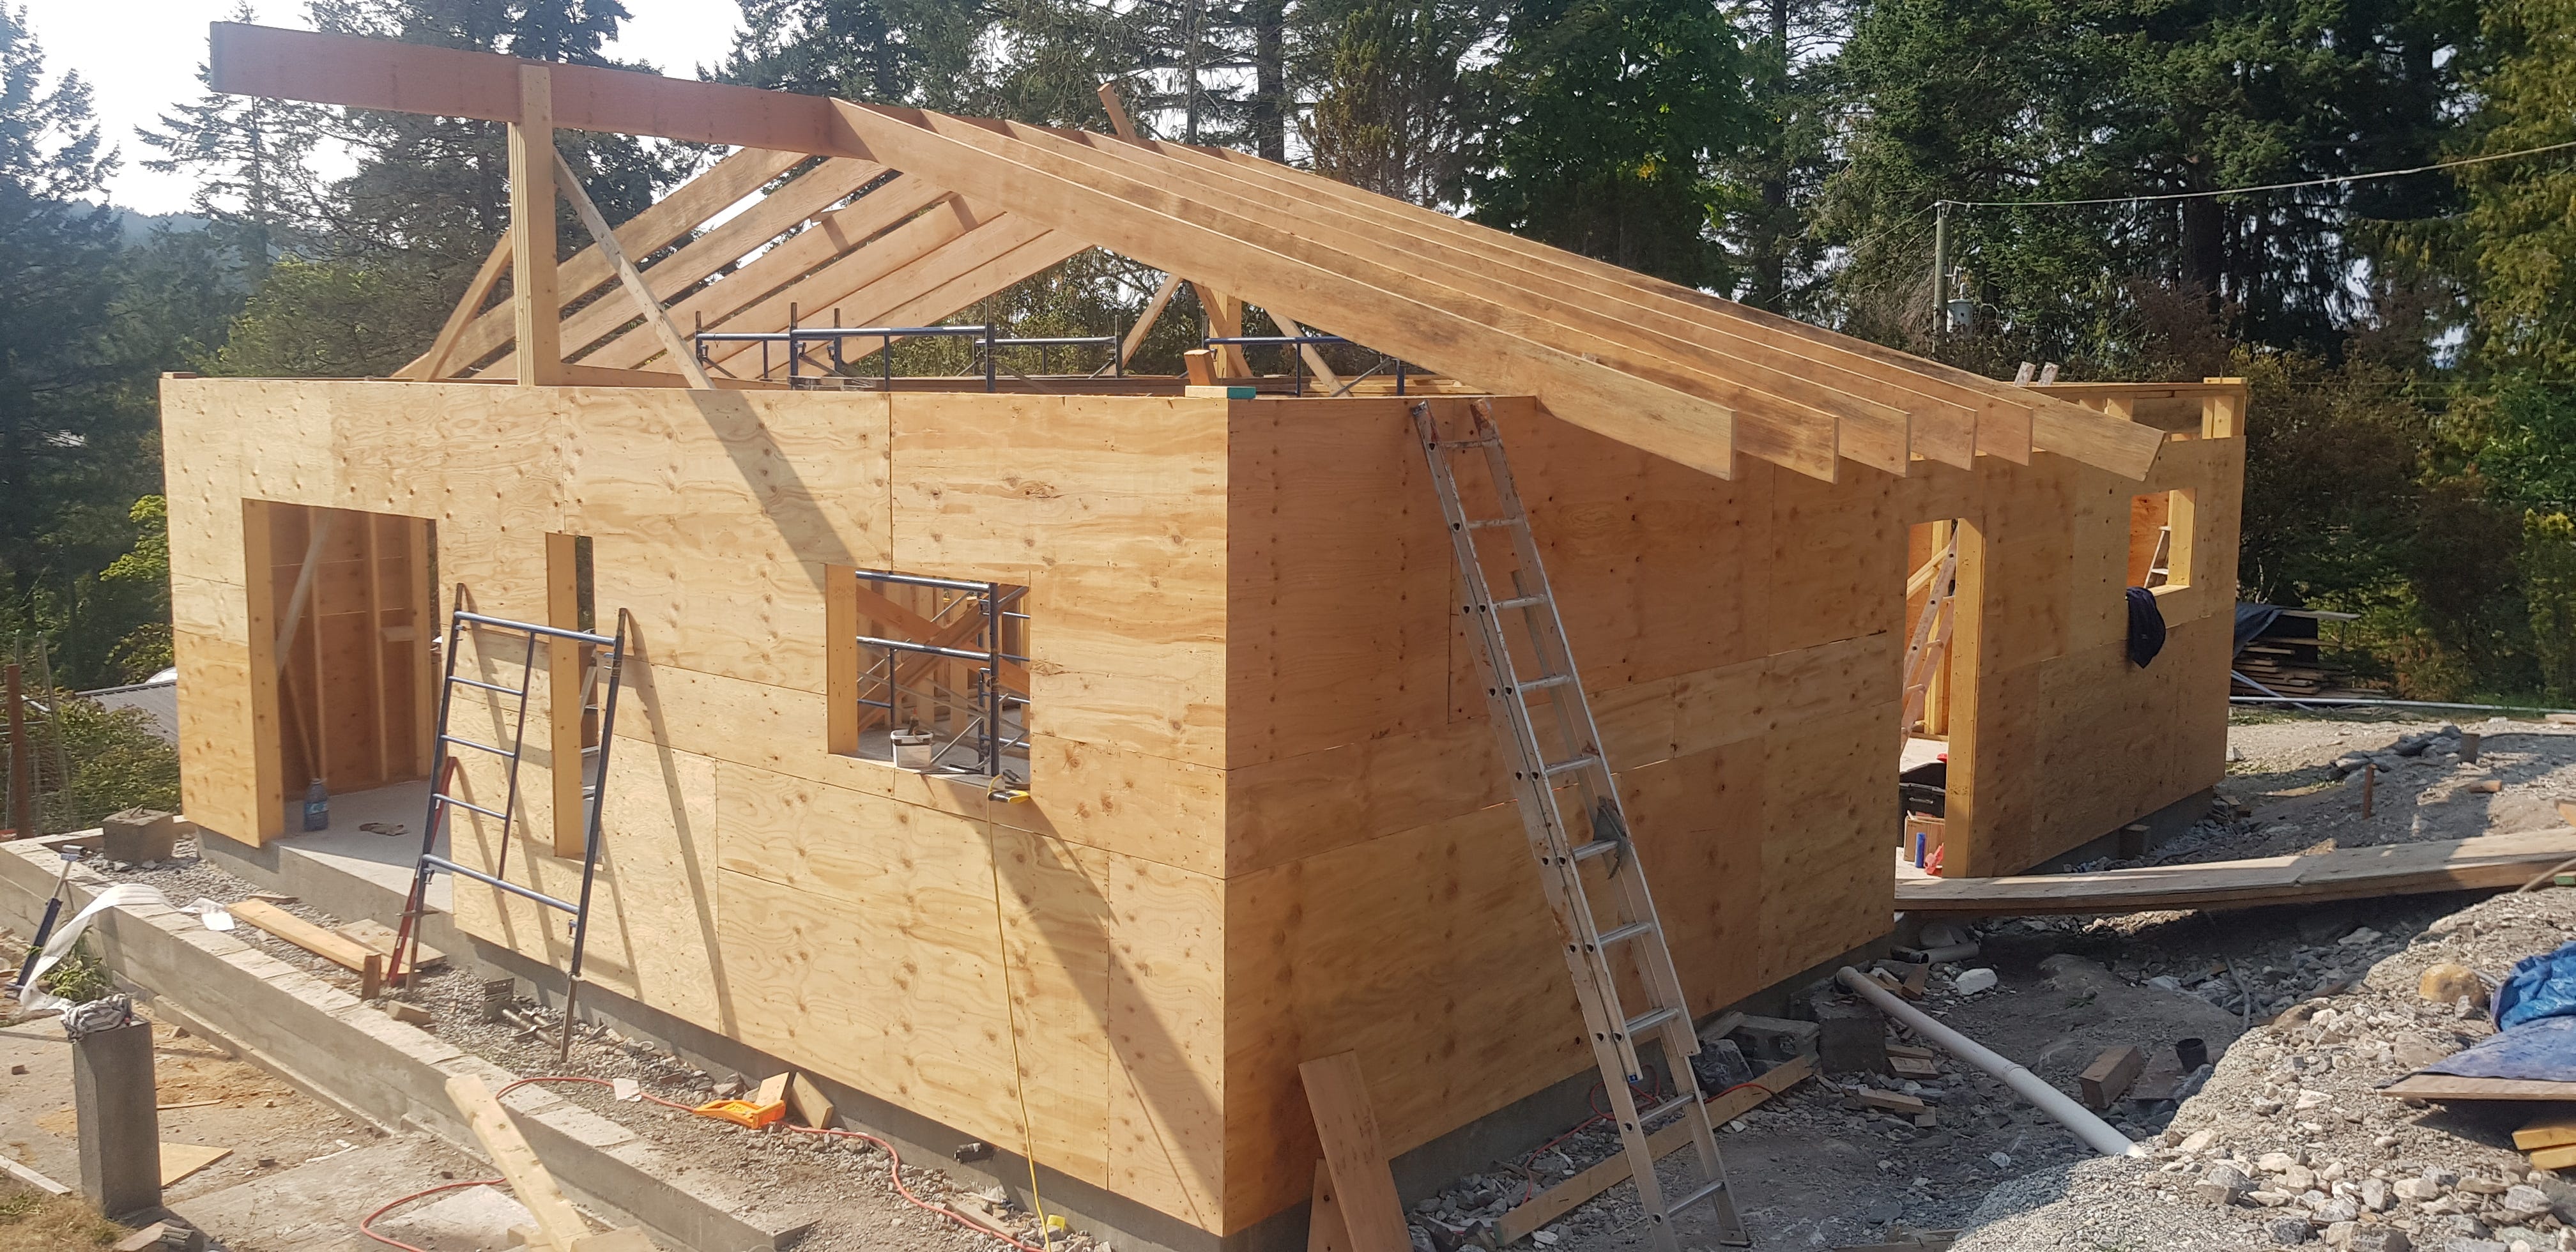
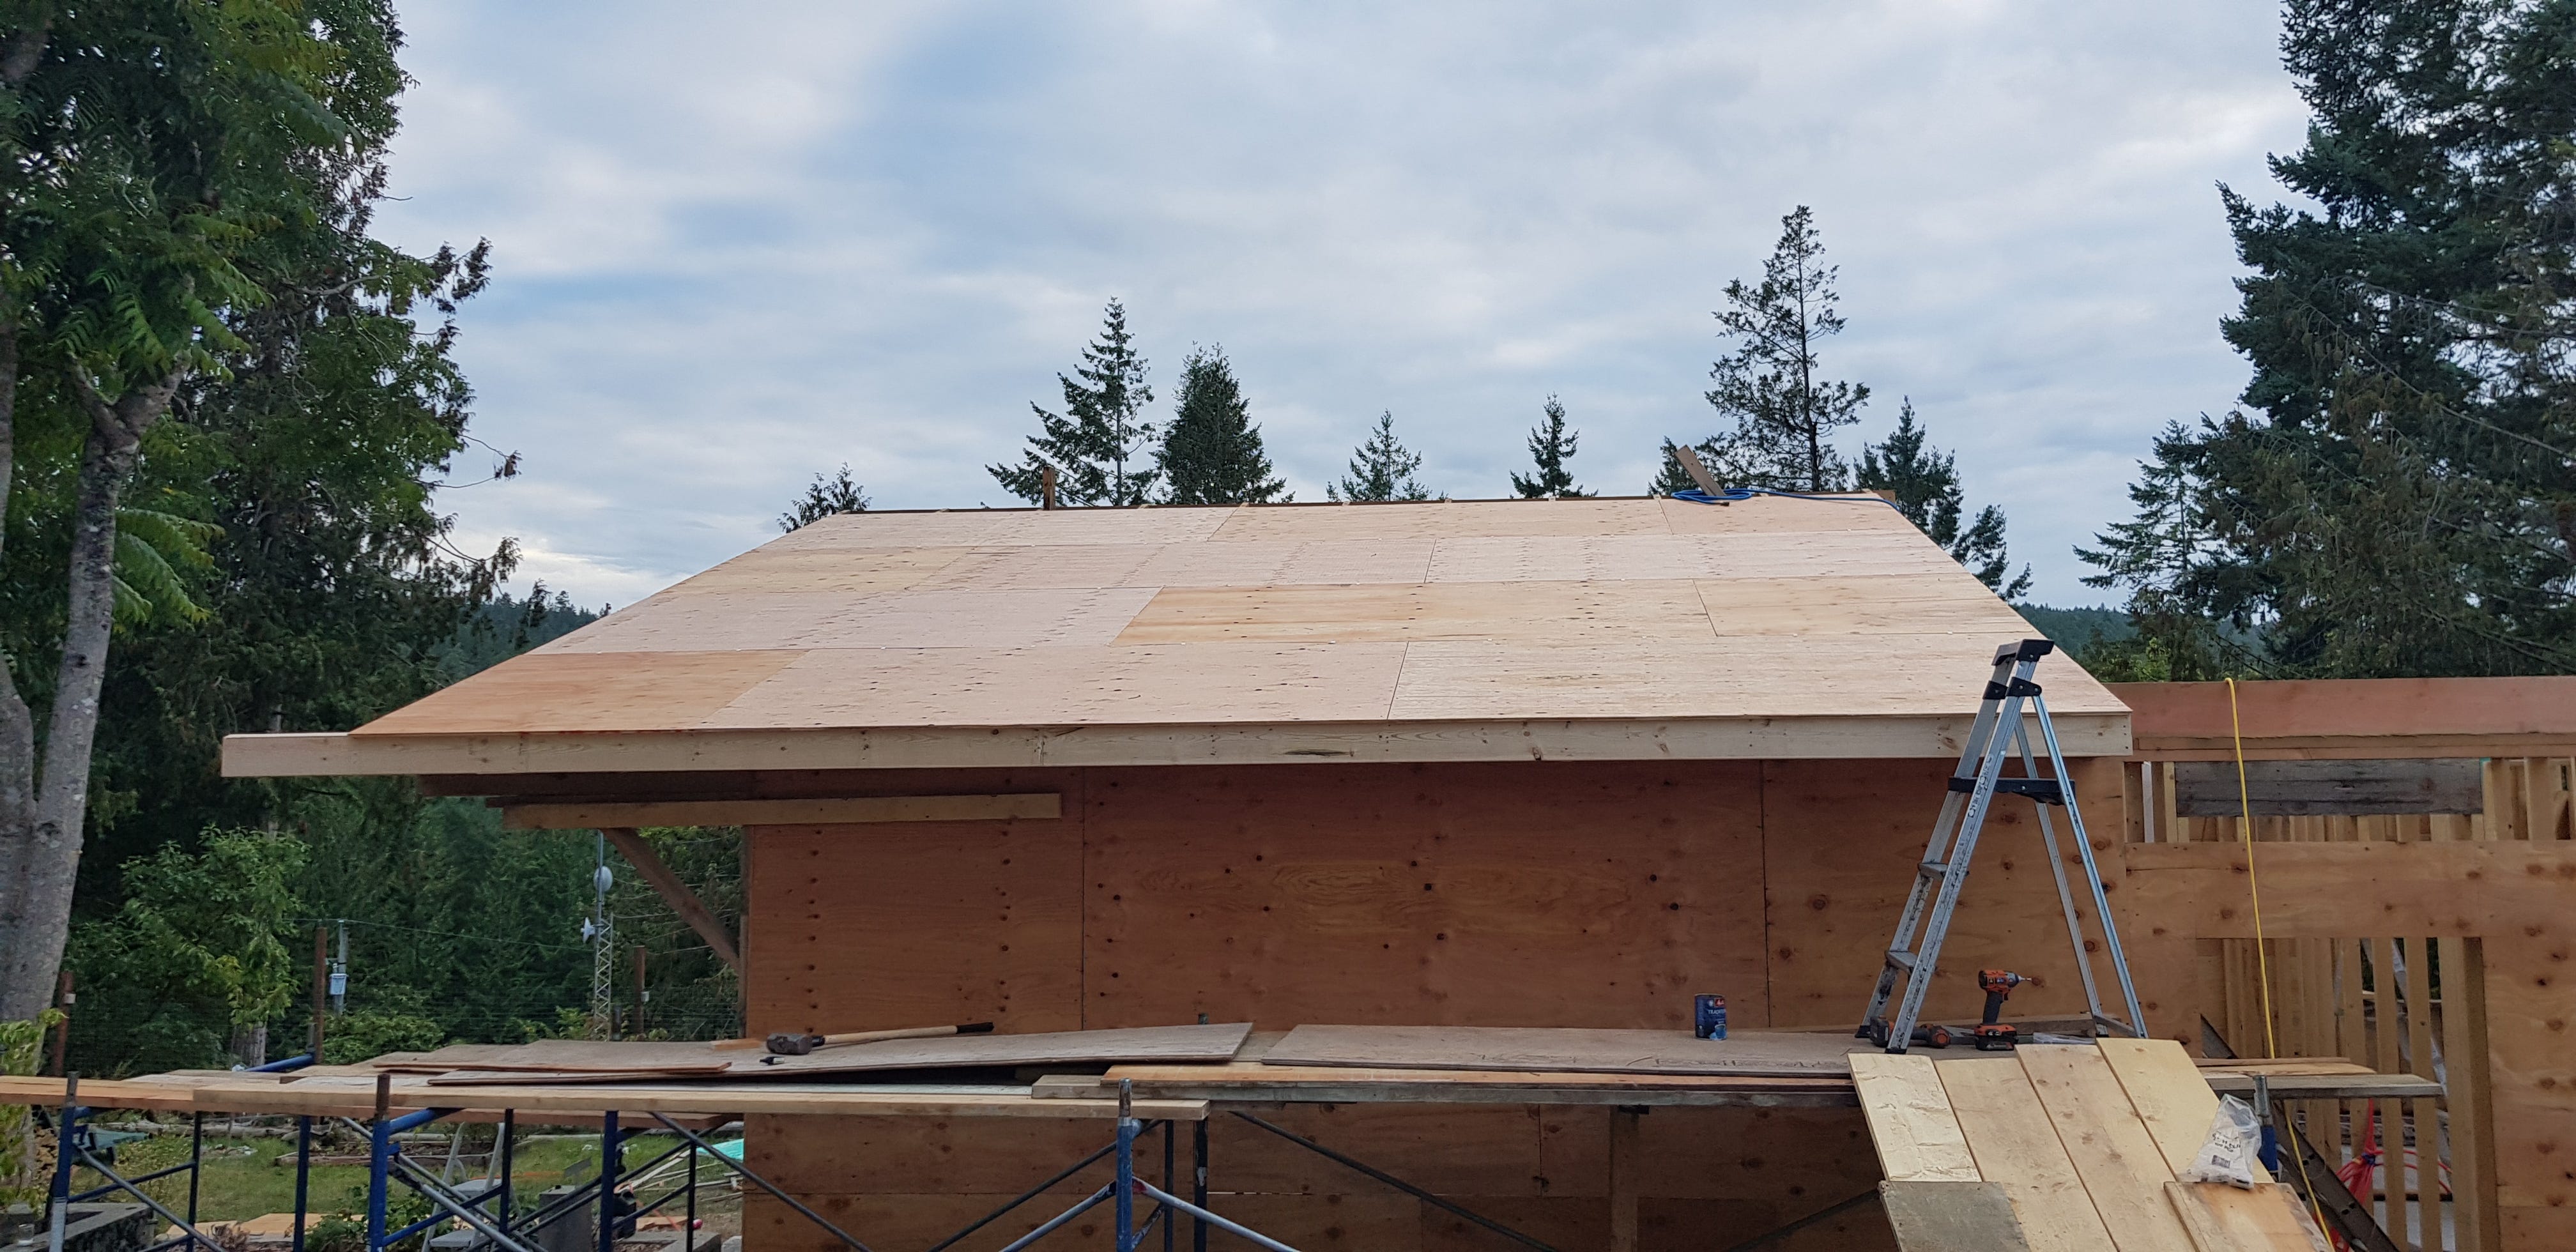
The guys left me with the first floor exterior walls up without the windows framed in fully, the first floor ridge beam set in place and the first 2 rafters cut and dry fit (installed without fasteners to ensure proper cut and fit). Over the next few weeks I chipped away at the window frames, installing the sheathing and building some of the interior walls, sometimes alone and sometimes with the assistance of my carpenter’s helper (Dad). This process was also complicated by how slow I was getting started on sheathing, as the sun is the enemy of straight lumber, especially when the lumber is still quite high in moisture content. Despite a cat’s cradle of bracing holding everything in place, the sun has caused enough twisting that most of the exterior walls had to be re-plumbed and straightened. Using ratchet straps, a sledge hammer and leverage we forced the partially constructed building back to relative flush, plumb, level and square, then installed the sheathing as quickly as possible to secure the walls in place.
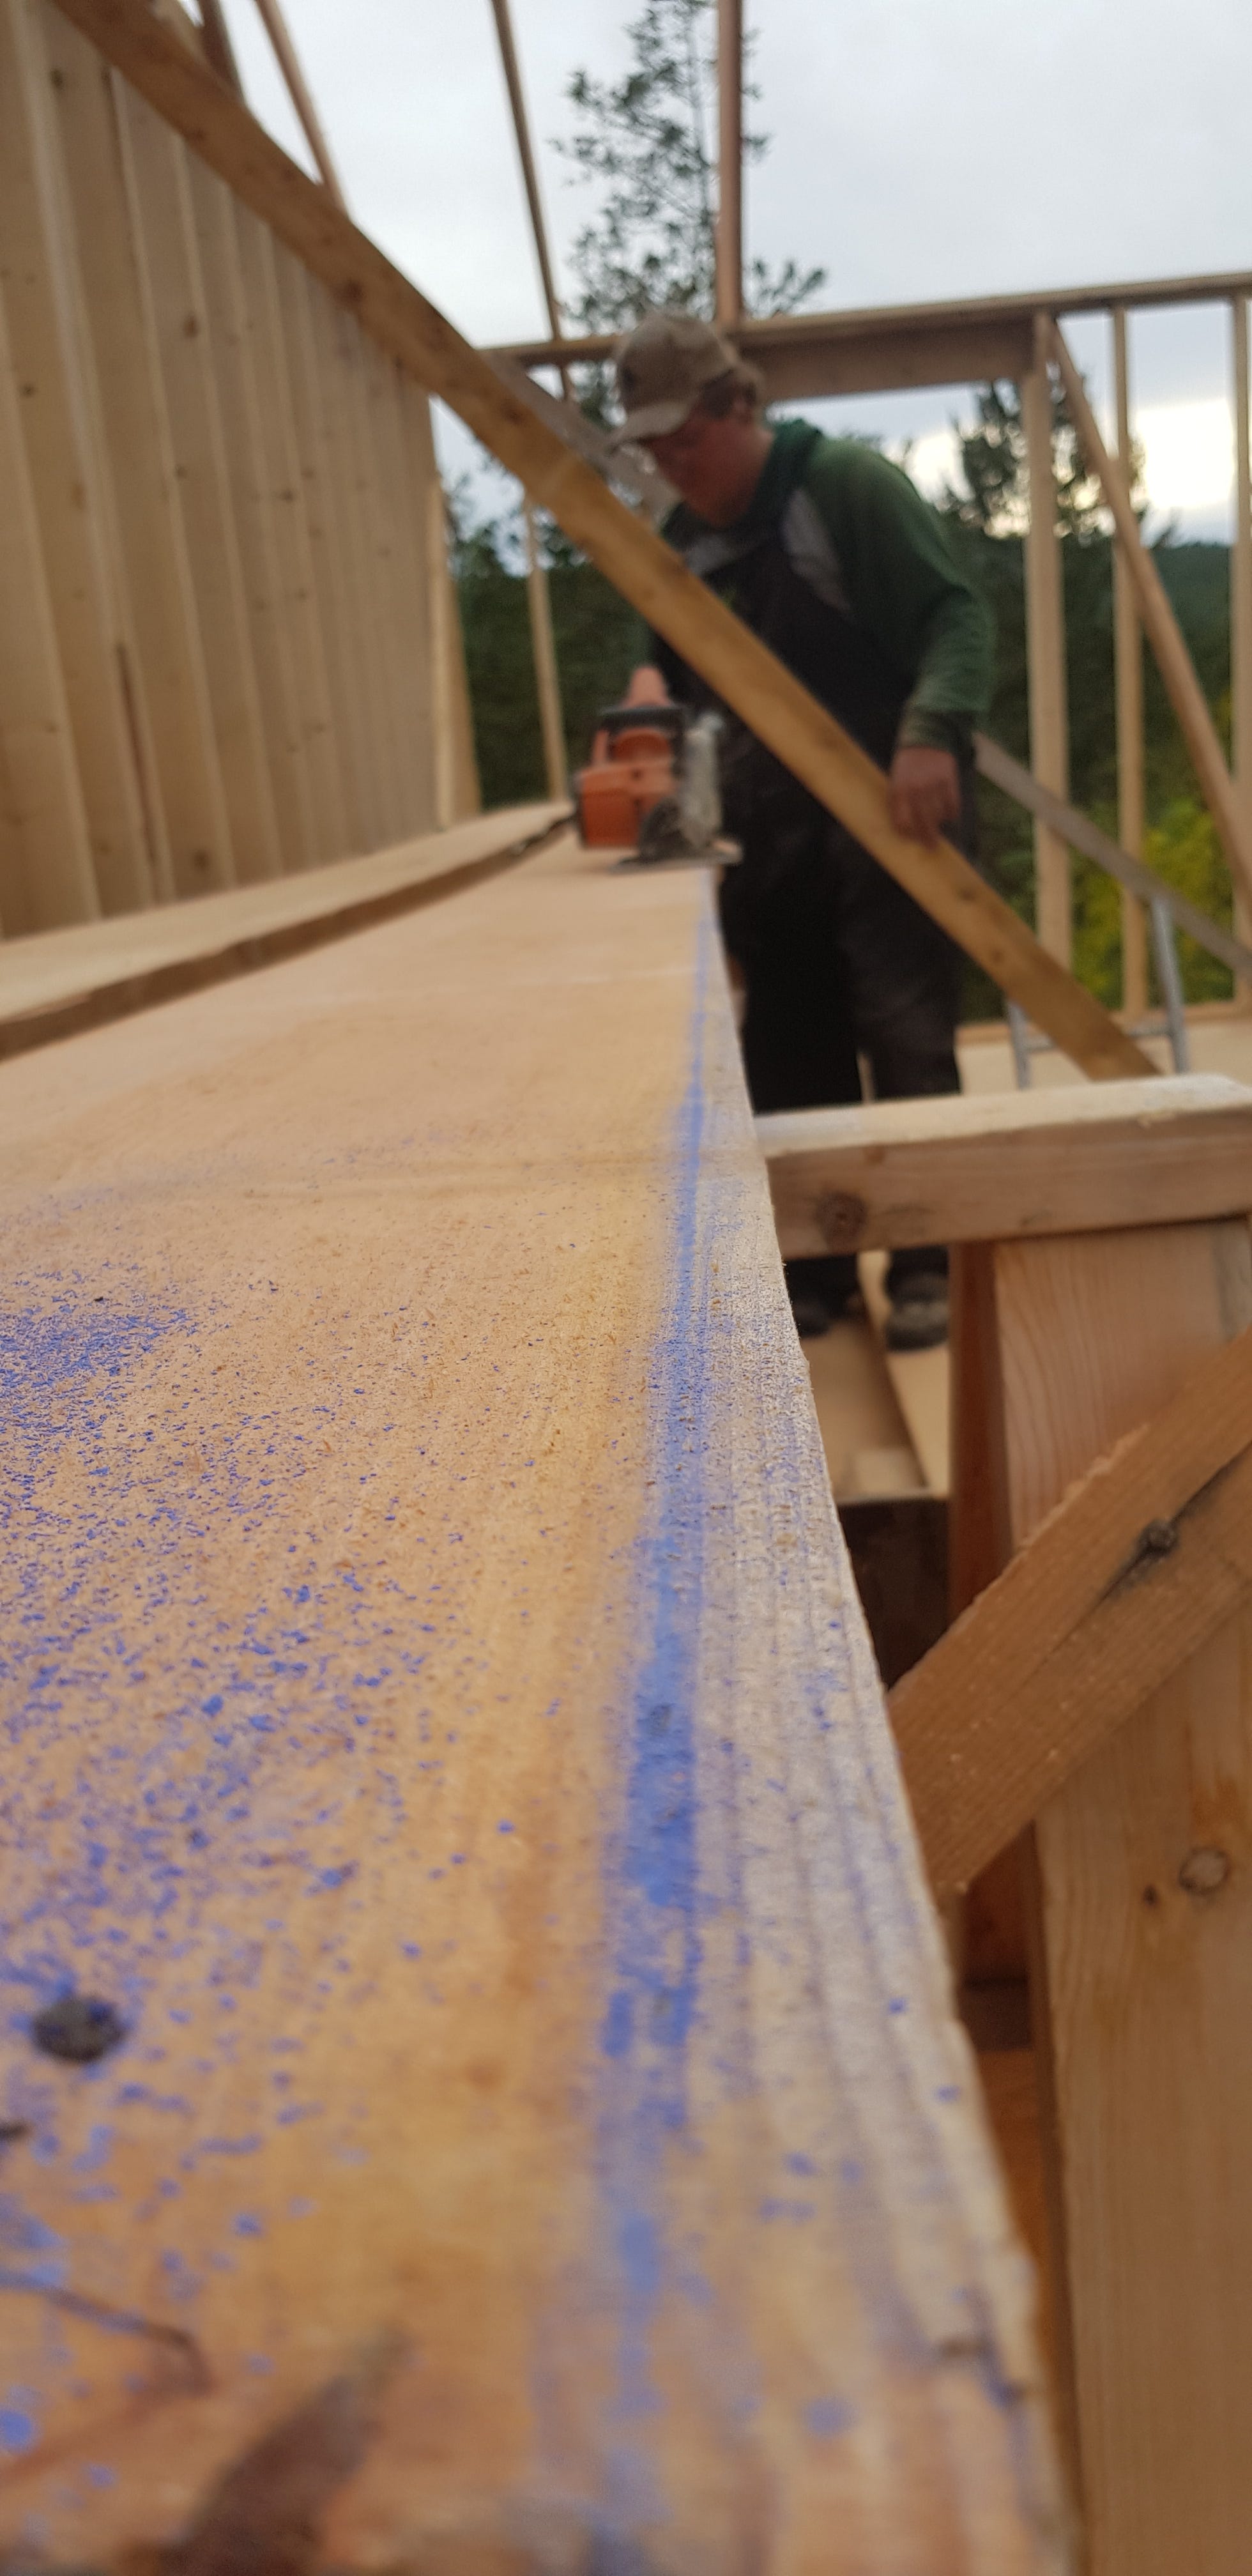
I had the same problem but much worse with the rafters once I put them up. Sidetracked with work and other small jobs, a week or so in the sun meant that I had to use clamps and leverage to force the rafters back into alignment while sheathing the roof, which made what should have been a quick process quite slow. But alas, once the roof was sheathed, it all looked great. With the approximations of a roof over half the building, we no longer had to spend an hour each day putting all the tools away in case of rain
It was around this time that Lucia and I booked ourselves a vacation, and consequently set a deadline for getting the building water proof enough for the rain season. We had one month to get the second story built and waterproof underlay over the roof. Deadlines certainly add a degree of stress to the project, but the urgency they instill certainly expedites progress.
In the next edition, I’ll be going over the second story framing, roof sheathing and waterproofing. One or two more of these summaries and I should be writing contemporaneously (“should” is the operative word here). Bear with me, there’s plenty more coming.